note |
The availability of the Scalar Mixer Calibration depends on the Analyzer model (See corresponding datasheet). |
Scalar mixer calibration is the most accurate method of calibration applied to measurements of mixers in frequency offset mode.
The scalar mixer calibration requires OPEN, SHORT, and LOAD standards as well as external power meter (See figure below). The power meter connection and setup are described in Power Meter Setting.
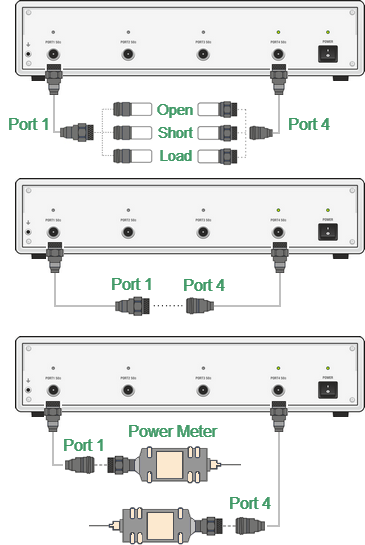
Scalar mixer calibration setup
The scalar mixer calibration allows the following measurements:
•Reflection S11 and S22 parameters in vector form.
•Transmission S21 and S12 parameters in scalar form.
The power meter can be connected either one port or both ports. If the power meter was connected to port 1, then S21 transmission parameter will be calibrated. If the power meter was connected to port 2, then S12 transmission parameter will be calibrated.
Before starting the calibration, perform the following settings: select active channel and set its parameters (frequency span, IF bandwidth, etc.), and define the calibration kit. Then enable the frequency offset mode and perform the port settings.
note |
The scalar mixer calibration can be performed without frequency offset. Frequency offset mode can be enabled later, during mixer measurements. In this case, the basic frequency range should cover the frequency range of each port in offset mode. This procedure is convenient, but less accurate as it involves interpolation. |
Scalar mixer calibration procedure
|
To access the scalar mixer calibration menu, use the following softkeys: Calibration > Mixer/Converter Calibration > Scalar Mixer Calibration |
|
Select port pair using softkey: Select Ports |


|
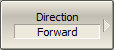
Then select the required calibration direction: •Forward •Reverse •Both Direction means the transmission direction to be calibrated. Direction determines the power meter connection port or both ports. |
|
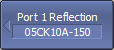
Click the Reflection Port n softkey. Connect SHORT, OPEN and LOAD standards to Port 1 as shown in the above figure. Perform measurements for each standard using the respective standard softkeys. The instrument status bar will indicate Calibration in progress... when the measurement is in progress. On completion of the measurement, a check mark will appear in the left part of the softkey. |


|
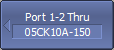
Connect a THRU standard between the test ports. Click the Port 1-2 Thru softkey if a flush thru or non-zero thru is used and is strictly defined in the calibration kit definition. Click the Unknown Thru softkey if a non-zero thru is used and there is no definition for it. The instrument status bar will indicate Calibration in progress... when the measurement is in progress. On completion of the measurement, a check mark will appear in the left part of the softkey. |


|
Click the Power softkey. If needed, zero power meter using the Power Sensor Zero Correction softkey. |
note |
The power meter sensor can be connected to the port, as during zero setting the output signal of the port is turned off. |
|
Connect the power meter to Port n and click the corresponding softkey. The instrument status bar will indicate Calibration in progress... when the measurement is in progress. On completion of the measurement, a check mark will appear in the left part of the softkey. |


|
To complete the calibration procedure, click Apply softkey. This will activate the process of calibration coefficient table calculation and saving it into the memory. The error correction function will also be automatically enabled. |

|
To clear the measurement results of the standards, click Cancel softkey. This softkey does not cancel the current calibration. To disable the current calibration, turn off the error correction function. |

note |
The calibration status can be checked in the channel status bar (See General error correction status table) or in trace status field (See Trace error correction status table) — SMC label. |